Posted on May 4th, 2020 by Tim Ennals
This guide will provide you with detailed instructions to add your email with My Hosting Bubble on your Gmail Account.
- Firstly we will begin by opening your Gmail from the drop down menu on the right hand side of your Google browser window.
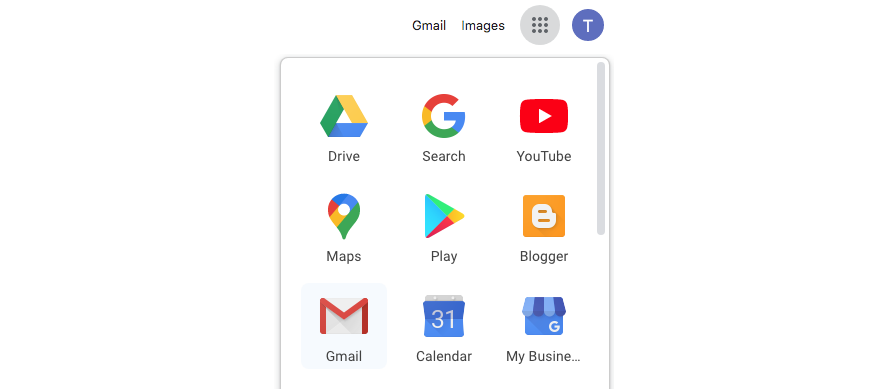
- At the top right go to settings icon, and select ‘Settings’.

- Now click ‘Accounts and Import’ then in the ‘Import mail and contacts’ Section click on ‘Import mail and contacts’.

- Now enter your email address of the account you want to add and hit ‘Continue’.

- Now enter your password, followed by your Pop username (this is the email address you want to add), and the POP server name (this is imap.myhostingbubble.com) and click ‘Continue‘.
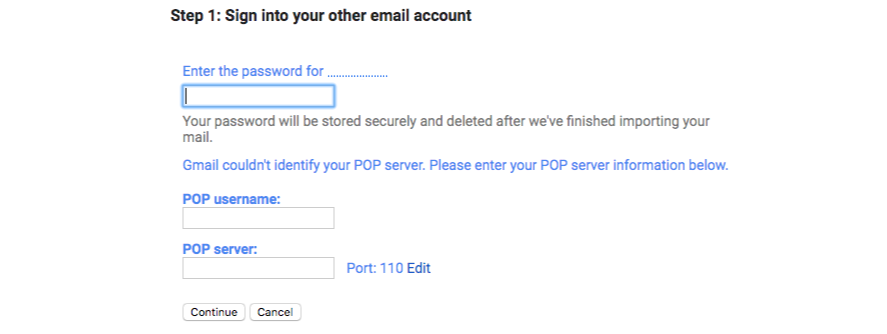
- You will now be given a list of import options, the ’Import mail’ and ‘Add label to imported mail’ options are already ticked, you want to tick the ‘leave a copy of retrieved message on the server’ so Imap will work (view emails on all devices/apps). The ‘Add label to all imported mail’ automatically adds the email address being added as the ‘label’ however you may want to change it, for example to a company name, once you are happy with this click ‘Start Import’.

- You should now have a message telling you your messages are being imported.

- Click ‘OK‘ to finish. Depending on the size of your email account it may take some time to download all your messages to Gmail, typically this is a quick process, and you will have your latest emails in your Gmail account shortly.
For more tips and other guides please check out our other blogs or visit our YouTube channel and subscribe.
Test your email, by sending an email using this link emailtest@myhostingbubble.com and you will receive an email back confirming that your account works.
If your email fails to send, or you do not receive an email back check out our email test page for tips here or review the steps you took above.


